Building web apps from scratch - The Accept Loop - Part 7
In this post we'll continue building or TCP echo server by adding the all mighty accept loop of our server. In the last one we managed to set up the listener socket, but didn't actually accept any TCP connection from it.
The Accept Loop
At this time our program looks somewhat like this:
| 1 | int main(void) |
| 2 | { |
| 3 | SOCKET listen_fd = socket(AF_INET, SOCK_STREAM, 0); |
| 4 | |
| 5 | if (bind(listen_fd, ...)) { |
| 6 | // ... |
| 7 | } |
| 8 | |
| 9 | if (listen(listen_fd, 32) < 0) { |
| 10 | // ... |
| 11 | } |
| 12 | |
| 13 | // TODO: Accept and process connections |
| 14 | |
| 15 | return 0; |
| 16 | } |
| 17 |
as we were saying, the listen function tells the system to start performing three-way handshakes and enqueueing connections that completed it. The accept function allows our program to read from that queue and return a socket descriptor for a newly established connection.
| 1 | int main(void) |
| 2 | { |
| 3 | SOCKET listen_fd = socket(AF_INET, SOCK_STREAM, 0); |
| 4 | |
| 5 | if (bind(listen_fd, ...)) { |
| 6 | // ... |
| 7 | } |
| 8 | |
| 9 | if (listen(listen_fd, 32) < 0) { |
| 10 | // ... |
| 11 | } |
| 12 | |
| 13 | for (;;) { |
| 14 | |
| 15 | SOCKET accepted_fd = accept(listen_fd, NULL, NULL); |
| 16 | |
| 17 | // TODO: process connections |
| 18 | |
| 19 | CLOSE_SOCKET(accepted_fd); |
| 20 | } |
| 21 | |
| 22 | return 0; |
| 23 | } |
| 24 |
We accept connections and get back a socket. When we are done with it, we close it. The logic related to the accepted connection is inside an infinite loop because we want to accept new connections when we are done with the old one. Listener and connection sockets are different kinds of sockets in terms of what operations you can perform on them. Listener sockets are made for calling accept(), while connection sockets are made for reading and writing bytes using send() and recv(). So let's use these functions to read a message and send it back:
| 1 | SOCKET accepted_fd = accept(listen_fd, NULL, NULL); |
| 2 | if (accepted_fd == INVALID_SOCKET) |
| 3 | continue; |
| 4 | |
| 5 | char input[128]; |
| 6 | int input_len = recv(accepted_fd, input, sizeof(input), 0); |
| 7 | if (input_len < 0) { |
| 8 | CLOSE_SOCKET(accepted_fd); |
| 9 | continue; |
| 10 | } |
| 11 | |
| 12 | printf("Received message is:\n%.*s\n\n", input_len, input); |
| 13 | |
| 14 | send(accepted_fd, input, input_len, 0); |
| 15 | |
| 16 | CLOSE_SOCKET(accepted_fd); |
| 17 |
First of all I added a error check after accept. Note that in general whenever we use continue in our loop, this will cause the execution to go to the top. It's a cool trick that allows us to jump back to the start!
The next thing we do after accepting is declare a buffer where our incoming message will be stored and call recv to actually read the bytes from the network. The return value will be equal to the number of bytes written to our buffer, so the length of the message. It may also return -1 in case of failure, which is why we have that extra check. I added a print statement so that the message will be loggen on the terminal. This will make it easier to see what is happening in real time.
Then, we use send on that same buffer to send it back. Note that send may also return -1 on failure, but that wouldn't change what we would do after it which is close the socket regardless, which is why we omitted the error check.
Testing the Echo Server using Netcat
Now that our server is fully functional we can try it out! First of all we need to compile the server using the same command as last time: Linux:
gcc -o main main.c
Windows:
gcc -o main.exe main.c -lws2_32
Now we need a way to send a message to our server in the first place. If you are on Linux or you are using w64devkit on Windows, then a great option is the netcat tool. By running nc 127.0.0.1 8080 when the server is also running, you will be able to type a message and send it by pressing enter.
Say this is your terminal tab for netcat:
$ nc 127.0.0.1 8080
Hello, how's it going?
Hello, how's it going?
^C
then this is what the server will look like:
./main
Received message is:
Hello, how's it going?


^C
the ^C token appears when you run ctrl+C to terminate the program.
Testing the Echo Server Using the Browser
As we said in the HTTP overview post, the HTTP protocol usually sits on top of TCP, which means an HTTP client is also a TCP client! In other words no one is stopping us from using our browser to send an HTTP request to our TCP echo server. Of course our server's response will be considered nonsense by the browser.
So let's spin up our server, then open the broser and navigate to http://127.0.0.1:8080/. In my case the result looks like this:
$ ./main
Received message is:
GET / HTTP/1.1
Host: 127.0.0.1:8080
Connection: keep-alive
sec-ch-ua: "Brave";v="137", "Chromium";v="137", "Not/A)Brand";v="2

Received message is:
GET / HTTP/1.1
Host: 127.0.0.1:8080
Connection: keep-alive
Cache-Control: max-age=0
sec-ch-ua: "Brave";v="137", "Chromium";v
while the loaded webpage looks somewhat like this:
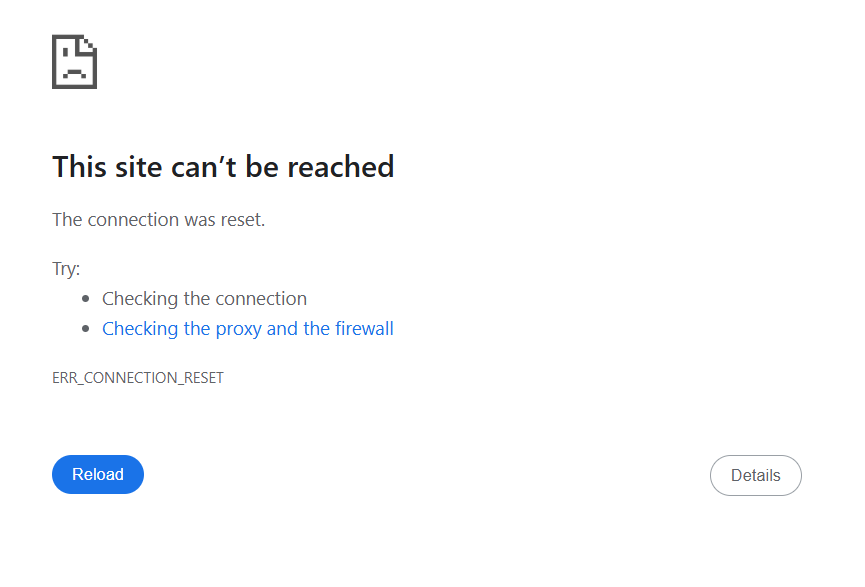 You can see now why we started from an echo server! The only real difference between an echo server and an HTTP server is that the received message is interpreted and instead of sending it back an appropriate HTTP response stirng is sent. Of course this requires some attention to detail and knowing how to put the pieces together, but at a conceptual level it's quite simple.
What's next
This echo server works but is quite crude! There are a number of corner cases that we'll want to handle to make sure it won't randonly crash or send incorrect responses. In the next post we'll look at all these corner cases and make sure our server is rock solid!
Join the Discussion!
Have questions or feedback for me? Feel free to pop in my discord
Join the Discord Server